Admin Guide
Document Categories
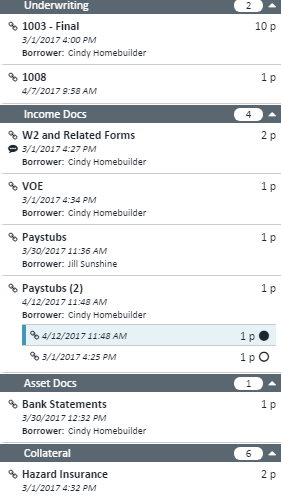
Document Categories are logical groupings of document types used for easier viewing in the document viewer. In the example below you can see that document types are grouped in such a way that will support this particular workflow.
To use document categories, simply follow these steps:
1. Enable Document Categories in the XDOC Admin
2. Create your document categories
3. Assign your document types (document definitions) to a document category
4. (Optional) Best practices when using document categories
Enable Document Categories in the XDOC Admin
1. Go to the XDOC Admin Project Settings> Project Features
2. If the "use document categories" default value is set to no, check the "override" checkbox and set the override value to "yes"
3. Click SAVE
Create Your Document Categories
1. In the XDOC Admin, go to Project Repository> Document Categories
2. Click CREATE. The Category Editor will appear 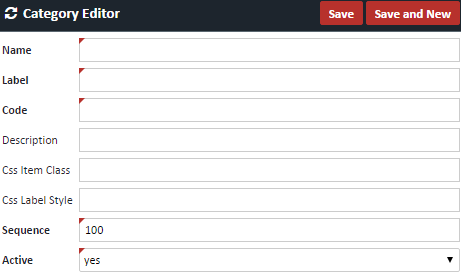
3. Enter the following information
| Field | Definition |
|---|---|
| Name | The name for the document category |
| Label | This is the label that will appear in the Viewer, if different from the Name |
| Code | Additional information for the Category |
| Description | Added description for the category |
| Css Item Class | CSS class to define the formatting of the category label. To be implemented in a future version |
| Css Label Style | This box is used to define individual characteristics of the category label. Using standard css language, you can define the color, style, font, background color and more of the category label in the Viewer Example: color: red; background-color: white; font-weight: bold; This will make the label red and in italic. The css format is - attribute:value; attribute:value; The color attribute uses the color name or hex code |
| Sequence | The sequence in which the category appears in the Viewer. This is very important for your workflow so consider this option carefully. |
| Active | Determines whether this category is active. Non-active categories will not appear in the Viewer |
Assign your document types (document definitions) to a document category
Once all document categories have been created, you can assign each document type to a category. To do this:
1. In the XDOC Admin, go to Project Repository>Document Definitions
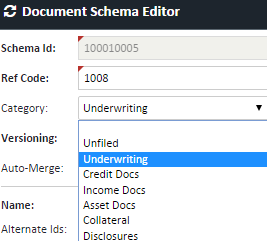
2. Open the document schema editor a document definition
3. Click on the Category dropdown and choose the appropriate document category
4. Click UPDATE
5. Repeat for each document definition you wish to assign a category
Best Practices for Using Document Categories
1. Assign every document type to a document category. When you enable document categories, each document type that is not assigned a category automatically gets assigned to an auto-generated category called "Other." This may cause confusion if all document types are not assigned a category.
2. Create a category called "Unfiled" or "Unclassified" and give it a Sequence number of 0 so it always displayed first in the Viewer. This way, users can easily distinguish which documents may need immediate attention when they open the Viewer.
3. Make sure to create a category for your left side/junk docs so you can easily distinguish where they are located. It's also best if they are at the bottom of the doc list (have the largest sequence number)
4. (Optional, but a good idea) – Color code your category labels to make easier to see various categories. Use the "Css Style" field in the Category Editor to assign the various colors and font styles to the label. Some of the test attributes available are: a. color: Color of the text b. background-color: background color of the field c. font-family: Verdana, Arial, Sans-Serif, Times New Roman, etc. d. font-style: italic e. font-size: size of the font f. text-align: center, right, left
It's recommended that you experiment with differing styles in your test environment to make sure that whatever you implement in production will make sense visually for your users.