Admin Guide
Document Stacks
A document stack is a list of document types that are used in a variety of ways such as viewing in the document viewer, bundle grouping and naming, printing and downloading, security profiles, as well as in Document Stack Security, which was covered in a previous section.
Creating a Document Stack
To create a document stack, go to the XDOC Admin section Project Admin>Project Repository>Document Stacks, and do the following
- Click CREATE. The Document Stack editor will appear.
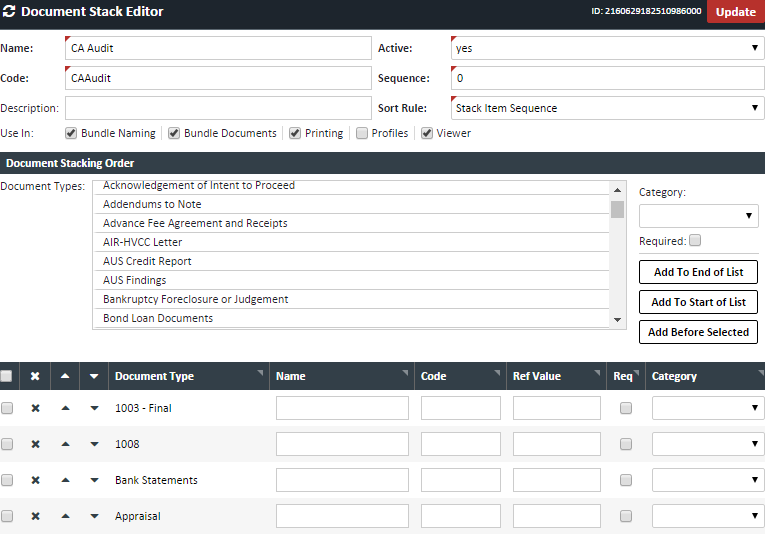
- In the Document Stack Editor that pops up enter the following information:
Field Description Name The name for the document stack Code An addition Code reference for the stack used for matching when doing advanced document stack security. The best practice for this field is to make it the same as the name, but with no spaces and no special characters Description Any added description if needed Active Choose “Yes” to make it active, or available for use Sequence Not actively used. You can ignore this field for now. Sort Rule Stack Item Sequence – Orders the documents by how they are ordered in the stack
Doc Type Sequence – The Document Type sequence. Equivalent to the sequence number in the document type editorStack Item Sequence Orders the documents by how they are ordered in the stack - Define how the document stack will be used - Check the appropriate check box to define how the document stack will be used. (You may choose more than one box):

a. Bundle Naming – You can also configure the way the bundled documents get named that conforms to a way specified by an investor or other recipient b. Bundle Documents – You can determine the document types that get sent with a bundle, as well as the order in which they get send c. Printing (Downloading) - Printing and downloading a group of documents from the document viewer’s print and download icons d. Profiles – Allow viewing and uploading of a specific set of documents per security profile. e. Viewer - Will show up as a view stacks in the document viewer
- Add documents to the stack
- Select a document to add to the stack. There are two ways to add documents to the stack:
- Double clicking on the document name - Automatically add the document to the end of the stack
- Clicking once on the document name, and then selecting:
- Add to End of List - Adds the document to the end of the stack list
- Add Before Checked - Adds the document to the stack before the checked document in the list. This is especially helpful if you already have a large document stack list and need to add a document to the middle of the stack
- Once documents are selected, you can move one or more documents up or down in the order, or remove them from the list with the buttons just to the left.
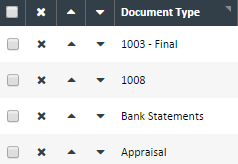
- To move or delete an individual document type, click the checkbox to the left of the document name
- ❌ removes the document from the list and places it back in the list of available document
- ▲ moves the document up one place in the list
- ▼ moves the document down one place in the list
- To move or delete a group of document types:
- Select the checkbox for each document type in the list
- Select the ❌, ▲, or ▼ box on the header column in blue

- To move or delete an individual document type, click the checkbox to the left of the document name
- Select a document to add to the stack. There are two ways to add documents to the stack:
- Click SAVE when done
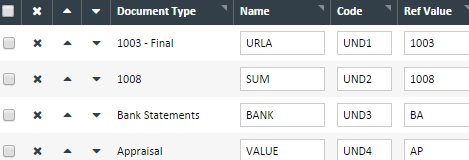
Using Document Stacks for Document Naming - Some bundle recipients (Investors, MI companies, Servicers, etc.) may require that individual documents be named in a certain way that is different than how your company names it. In the document stack, the "Name", "Code", and "Ref Value" fields are three additional options for naming individual documents sent to these recipients. To use this alternate naming:
-
Place the alternate name for the document in the "Name" field. If there are additional names you want to use for this document, use the "Code" and "Ref Value" fields.
-
Use the appropriate token in the bundle template or bundle profile that will use this field for naming the document. The tokens are: a. Name field: $$Naming.name$$ b. Code field: $$Naming.code$$ c. Ref Value field: $$Naming.refValue$$