Admin Guide
Bundle Profiles
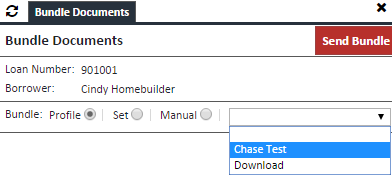
Bundle Profiles define where a packaged bundle gets sent. Although a Bundle Profile does have some basic packaging capabilities, we tend to rely on the Bundle Template for packaging. The profiles defined in this section are the profiles that are displayed in the viewer when choosing the Bundle button from the actions bar.
Creating a Bundle Profile
-
From the Bundle Profile page, click CREATE. The Bundle Profile Editor appears.

-
Enter the following information for the available fields
Field Description Bundle Profile Editor Name Enter a name for your profile Code Additional Code for your profile. For ease of use, you can use the same information as the Name Description Enter an addition description, if needed Active Make sure this says "yes" in order for this to show up in the list of available profiles in the Viewer Sequence Leave as is Template If using a template for this profile, choose that template here. When you do so you will notice many fields disappear from view, as they are already included in the chosen template Document Tab Use Documents From Stack Choose the appropriate document stack here, or choose it manually from the list below. We strongly recommend you always use a stack. Use Document Names From If using a naming stack, enter it here from the dropdown. A naming stack is a stack you use when the recipient requires the documents to be named with their own names. Manual Document selection If not using a document stack, manually select the document types from the box on the right and clicking either the "required" or "optional" boxes to move them over. You can also double click the document types in question to move them over. Once all the documents are on the right side, you can order them appropriately with the "Move Up" and "Move Down" buttons. You can select multiple document types by the Ctrl+click and Shift+click methods.
You can choose between documents and reference documents with the selector just above the left hand side box.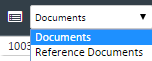
-
The Packaging Tab defines how the documents in the bundle are packaged. The fields are:
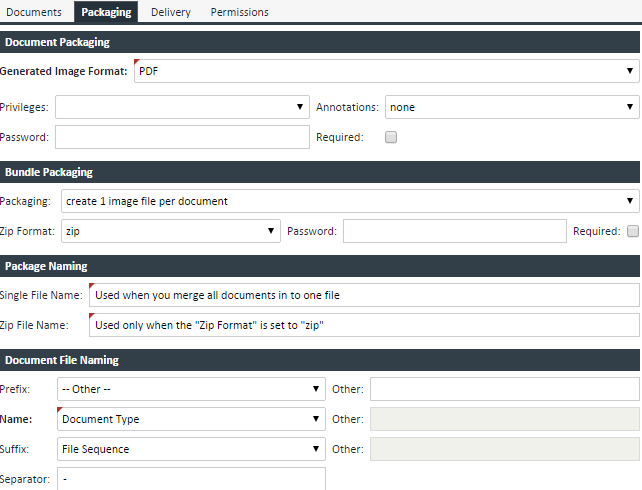
Field Description Document Packaging Generated Image Format Defines how color docs are created (PDF, TIF) Privileges For PDF delivery, the pdf privileges for the document recipient. NOTE: We highly recommend you leave this blank, as it will grant the recipient all privileges. Annotations For PDF delivery, the type of annotations that will go with the bundle. Only Permanent and Public annotations can be sent with a bundle. Personal annotations cannot be sent with a bundle. Password For PDF delivery, defines the password (if any) for the documents Required If checked, will require the user to enter a zip password when sending the bundle Bundle Packaging Packaging Either create one Image file per document or merge all pages into one file ZIP Format ZIP or none. If you create one Image file per document, you must zip the package Password Default password for the ZIP file Require If checked, will require the user to enter a zip password when sending the bundle Package Naming Single File Naming Name of the single image file. This is only used when the packaging is set to "merge all documents into 1 image file" Zip File Naming Name of the Zip file Document File Naming Each document in the bundle can be named with a prefix, name, and suffix, and each of these fields can be separated by a separator. The dropdown has a list of preconfigured names, or you can choose another name in the "other" column to the right. If the separator is a dash "-" the document name will be prefix-name-suffix.pdf Prefix The prefix for the file name Name The middle portion of the file name Suffix The suffix for the file name Separator The separator for the prefix, name and suffix fields -
The Delivery Sub Tab defines how the package will get sent. The choices are: a. Download – The user will be prompted to download the file to their desktop b. HTTP – XDOC will perform an http post to a particular website c. FTP – Rarely used. Will utilize ftp protocol to deliver file (not secure) d. Server File - Will delivery to a network folder. XDOC's IIS Identity user must have permissions to this folder for this to function properly e. SFTP – By far the most commonly used method to send to outside recipients. The specific instructions for sftp delivery are detailed in the Bundle Template instructions. It is highly advisable that you use a Bundle Template if you're going to send via sftp
-
The Permissions Sub Tab describes the available permissions when sending a bundle created with this profile.
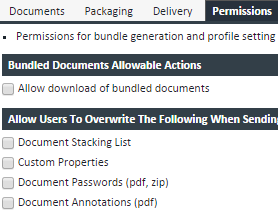
Field Description Bundled Documents Allowable Actions Allow download of bundled documents At time of delivery, allows overriding the specified delivery type to download the file to the desktop. Very handy for testing. Allow user to override the following when sending the bundle Options you can override when sending the bundle Document Stacking List Override the document stack list Custom Properties Override any custom properties Document Passwords Override document passwords, if any Document Annotations Override any annotation settings, if any -
When all fields have been completed, click SAVE and test your delivery